The Access Controls feature will enable teachers to control which projects students can have access to. First, we’ll look at what those controls are and see how they impact the student and the teacher. Then we’ll open the teacher’s Gradebook to see where those controls get saved.
The controls are Available, Excused, Skip, and Lock.
Available
If a project is made Available, the student can immediately start and submit this project.
Note: Available projects will be shown as "Not Started" in the Gradebook until the student begins the project. When started, the project status will change to "In Progress".
Excused
Excused projects can be reviewed and completed, but they cannot be submitted to the teacher. Therefore, teachers can’t score this project. If it was already scored, its score will not be factored into the average score calculation.
When a student opens an Excused project, they will see a message explaining this project is excused and will not be scored.
The Gradebook will show this Excused Icon
Skip (formerly "Blocked")
Skipped means that students can move past a project that is blocking them from moving on in the course. The student will not be able to access this project. Like Excused, teachers can’t score this project. If it was already scored, its score will not be factored into the average score calculation.
The Gradebook will show this Skip icon
Locked
Students cannot open the project or any project that comes after until their teacher unlocks it.
Exams are locked by default.
The Gradebook will show this Lock icon
How to Make Changes:
First, navigate to the section that you want to view. You’ll see your Gradebook, which gives you an overview of your class's progress.
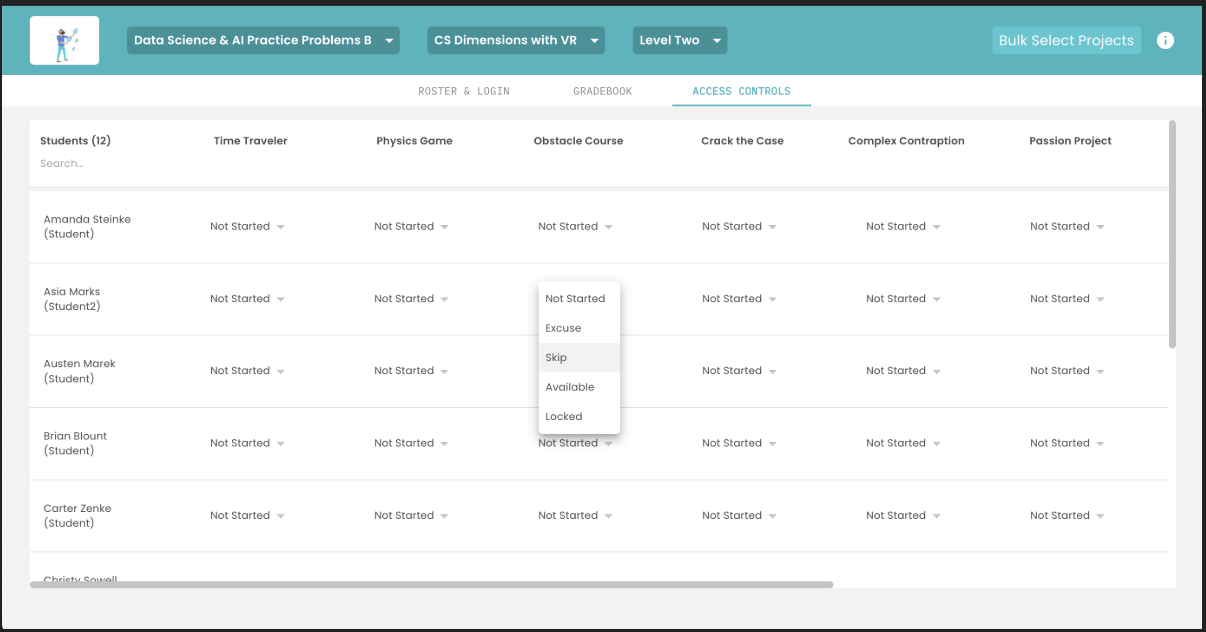
Click the Access Controls tab to open the Access controls page.This page is similar to the Gradebook, where we see a list of our students and the status for their projects.
Each cell has a drop-down menu with a list of available options to choose from. You will always see the current status at the top of the list.
Make changes for one student: Click the dropdown arrow, then select the control (Excuse, Skip, Available) that you want to apply to that student’s project.
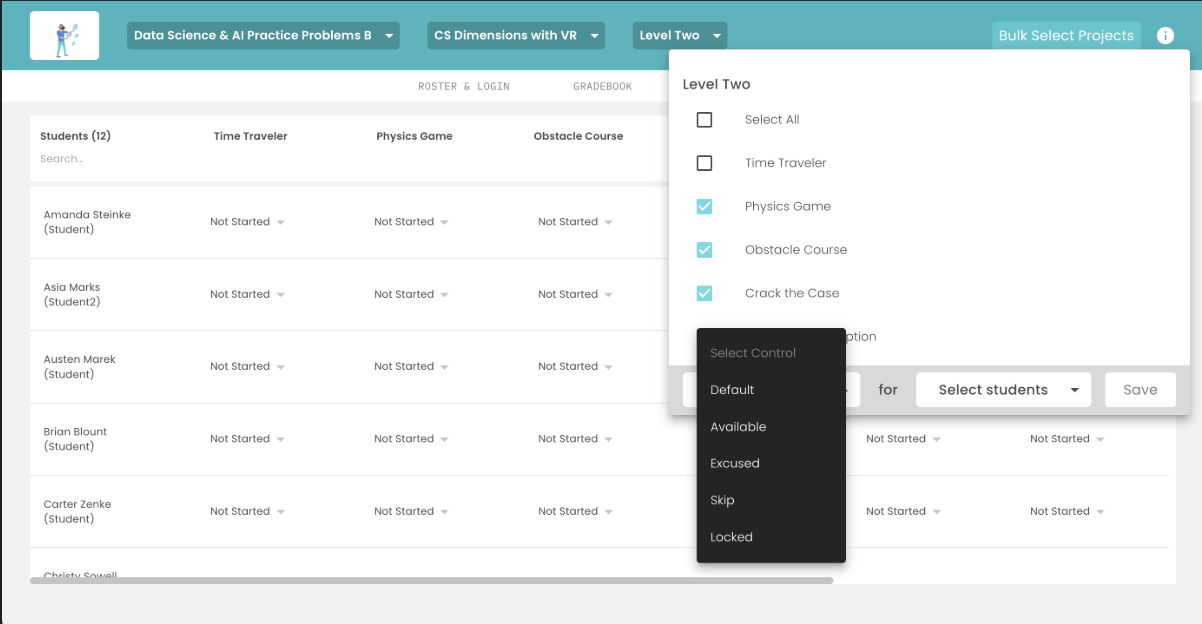
Make changes for multiple students across multiple projects:
Click the Bulk Select Projects button in the upper right corner of the page:
Select the projects you want to put a control on
Select the control (Excuse, Skip, Lock, Available)
Select the students that you want these changes applied to
Click "Save"
Review this video to see how Access Controls works for multiple changes at a time:
If you see an error message, it means our system failed to perform the action. But don’t worry–give it another try or contact our customer success team if you have further issues.
When you’re finished on the access controls page, you can go back to your Gradebook, where you’ll see the changes.